ClearDial – Windows Notifier
On January 3, 2013 by Sean With 0 Comments
- Windows Phone
Windows Notifier for ClearDial
The Windows Notifier for ClearDial is to be used along side the ClearDial app for Windows Phone. It is required in order for your Windows Phone to receive notifications.
You can download the Windows version of the notifier by clicking here.

- Once the application is installed, you can set it as a start-up task on your windows machine to ensure that it opens up when you turn on your computer. Keep in mind that if this application is not running, you will not receive notifications on your phone alerting you of new Google Voice messages.
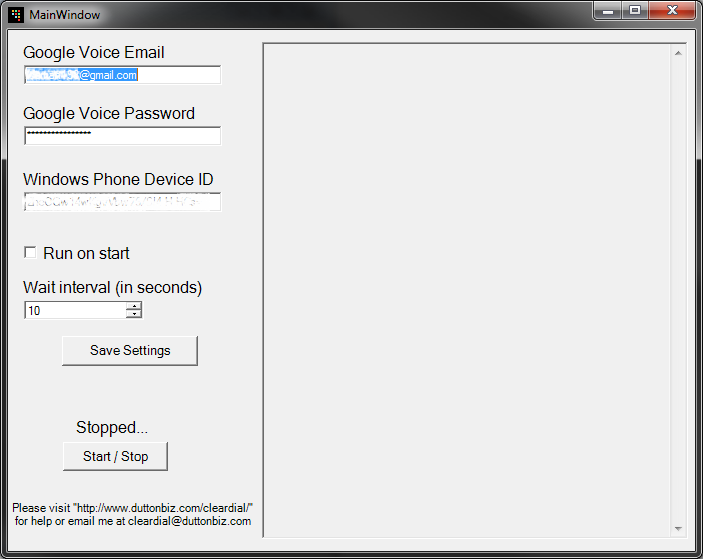
- Simply start the application from your start menu. Fill in the required information. You can get your Device ID by opening up the ClearDial app on your Windows Phone, go into ‘Settings’ and then click ‘Email my device ID’. This will then launch your default email account on your phone. You can then simply send the email to yourself and check your email on your computer. Copy and paste the device ID into the Windows Notifier application. You may miss something if you type it in by hand.
- You can use the ‘Run on start’ check box to decide whether or not you want the application to automatically start checking for new messages upon launch.
- You must click the ‘Save’ button in order for the new information to take affect.
- To have the application start checking for new messages, click the ‘Start/Stop’ button. The application will then start checking for new unread messages every 10 seconds (or whatever you have set for the ‘Interval’).
- To test that the application is working properly, have it “Running…” and then log into your Google Voice account and mark a message as unread. If everything is working properly, your Windows Phone should soon alert you that you have a new message.
If you have any trouble or questions, feel free to leave a comment below.